2010. szeptember 24., péntek

Photoshop: High Pass Softening

Eredeti: Helen Bradley, Digital Photography School, Photoshop: High Pass Softening: "

high_pass_softening_before_after.jpg


You may already know that it is possible to sharpen an image using the High Pass Filter. But did you know it’s possible to use the filter to soften an image?


To see this at work, start with an image open on the screen.


high_pass_softening_step1.jpg


Duplicate the image background layer or if you have an image that has adjustments in it, create a flattened version of the image on a new layer at the top of the layer stack. To do this target the topmost layer and choose Layer > New > Layer.


Target this new layer and press Ctrl + Alt + Shift + E (Command + Option + Shift + E on the Mac) to create a flattened version of the image on this new layer.


high_pass_softening_step2.jpg


You will apply the High Pass Filter to this layer.


To do this, you can convert the layer to a Smart Object by choosing Filter > Convert for Smart Filters.


If you’re working on a version of Photoshop earlier than CS4, you can still use this process without converting the layer to a Smart Object.


Choose Filter > Other > High Pass and set the High Pass filter Radius to a value that shows gray and white lines on the image. Stop short of the image showing too much color. The larger the radius value, the more the softening effect although too large a Radius will be counter-productive. Click Ok to apply the filter to the image.


high_pass_softening_step3.jpg


In the Layers palette, set the Blend Mode of the top layer to Soft Light.


To soften the image, select the High Pass filter layer and choose Layer > New Adjustment Layer > Invert. You’ll need to create a Clipping Group between the Adjustment Layer and the High Pass Filter layer by selecting the Adjustment Layer and choose Layer > Create Clipping Mask.


high_pass_softening_step4.jpg


Create a black filled mask on the High Pass Filter layer by Alt + Clicking on the Add a Layer Mask button at the foot of the Layer palette (Option + Click on the Mac).


Set the Foreground color to white and paint on the mask with a soft round brush in the areas that you want to soften the image such as the skin tones here. This image shows the masked area – you won’t see this as you work.


high_pass_softening_step5.jpg


If you created a Smart Object the High Pass Filter can be adjusted by double clicking on the filter in the Layers palette and adjust the Radius value.


You can use a different blending mode on the masked layer such as Overlay if that gives results you like better and you can also change the opacity of the layer to reduce the intensity of the effect.


Post from: Digital Photography School


"

Engagement Portrait Posing Tips

Eredeti: Digital Photography School, Engagement Portrait Posing Tips: "

A Guest Post by Travis Hill from The Perfect Pose


engagement-4.jpg
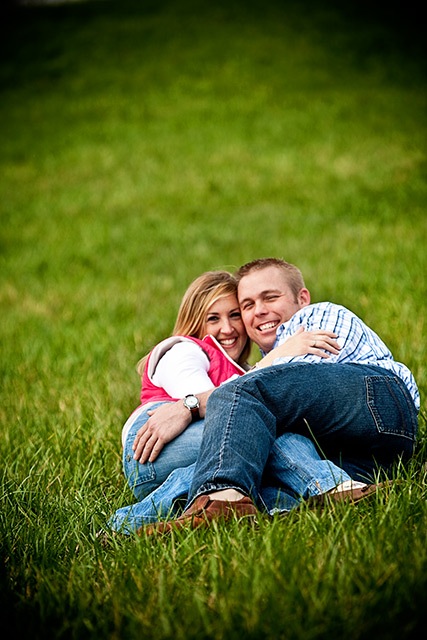
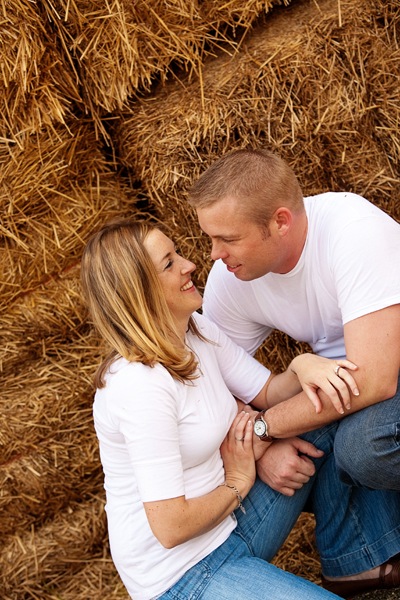
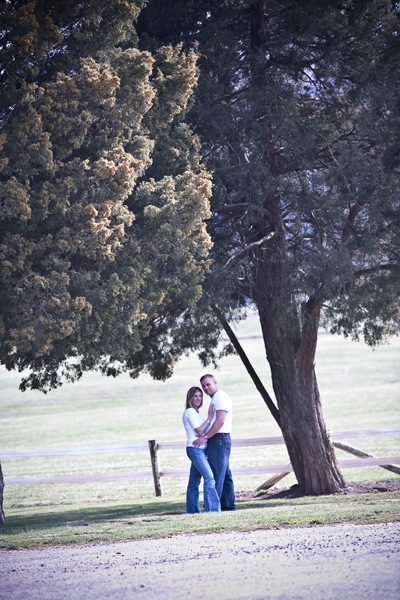
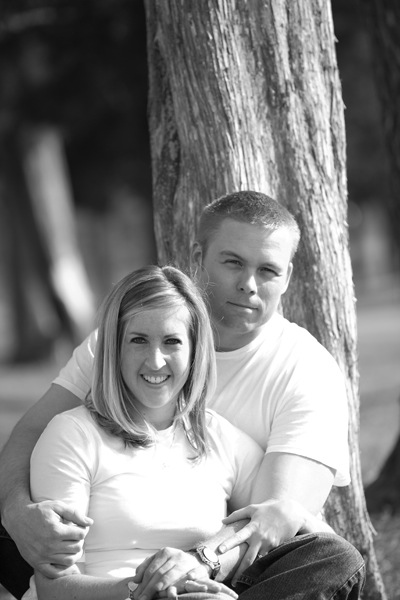
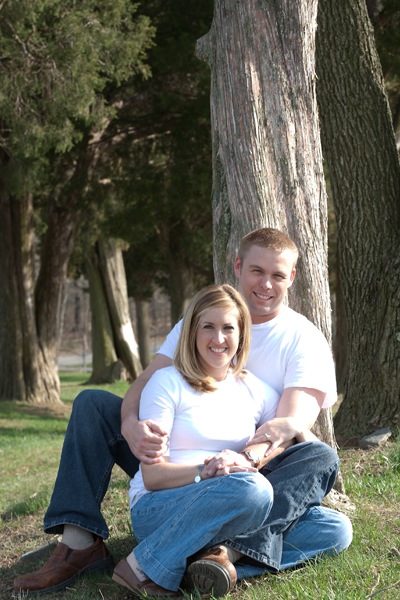
In recent years photojournalism has been all the rage. Just capture the day or moment as it happens. Honestly that is wonderful style of photography that many people enjoy. The problem is, everyone’s doing it. With so many new photographers in the market today, it’s imperial that we set ourselves apart from the crowd. With that being said lets ask ourselves honestly. How many times have our wedding clients not wanted any formal photographs? How many times have our portrait clients asked; “What should I do”? In these situations we cannot simply rely on photojournalism. We must be able to instruct our clients how to stand, how to hold their shoulders back, we as professional photographers need to tell our clients how to look their best. It’s time for us to take control and make the magic happen.


Know your client: Most people don’t think of this when they think of posing. This is the first step in creating a pose. We need to understand our client’s personality; we need to capture who they are. Establishing a relationship with our clients will not only help us understand what it is they want, it will help build trust. Trust is crucial when it comes to photographing clients. I can’t tell you how many times I have wanted to do something funky, and then get a strange look from the client. Then I just say “Trust The Photographer”. Because I have already established a relationship with the client, they are more willing to “Trust Me”.


Here are some ideas for posing engagement sessions


When you’re posing a couple for an engagement session, remember they’re in love. They want cool artistic images, but they also want some nice romantic images that show their love for one another.


In this image I had my clients lie on the ground and wrap up tight. Of course they didn’t mind! Let you clients have fun with the pose. Remember just because we are posing people, it doesn’t mean they have stiff and boring. Always be willing to go above and beyond the norm.


engagement 1.jpg


From this pose we can change our angle and have the couple move around slightly to easily create a few more images. Which is always great, because changing the pose just a little can completely change the image. Tell your clients how good they look. This is going to automatically make them look at you, and then almost always they will look back at each other and smile.


engagement 3.jpg


engagement 2.jpg


Now just have your clients sit up for the final image in this series. (He actually grabbed his fiancé and rolled her over top of him. That’s why they are laughing, and she is on the other side of him.) Let you clients have fun, and embrace what they do. Posing is about interacting and having fun more than just telling someone what to do.


engagement-4.jpg


Two quick poses you can do every time. Look at me, look at each other! This gives them a photo that Mom is sure to love. Plus they have a shot that looks candid, the photo looks natural and doesn’t look posed, but it reality it was. Something important to remember in posing: No matter how posed the shot is, we always want it to look comfortable and natural.


engagement-5.jpg


engagement-6.jpg


Don’t be afraid to add some background to you shot. Give your clients some space and take in the scenery. Clients are going to want some artistic photos as well.


Notice the pose in this image. They are not facing me. I have there bodies turned toward each other with them looking at me. This will always help slim your clients.


engagement-7.jpg


Get two images from one pose. I almost always have my clients pose where the girl is leaning into they guy. Whether it be sitting or standing. It’s a nice relaxing pose that looks very comfortable. And you can always get two images from this one pose. Simply zoom out and give the image a new look and a new feel.


engagement-8.jpg


engagement-9.jpg


Now when I think; “what do my clients want to look like in an image”? Usually I think they want to look cool. So you always have to set up a cool looking pose. This doesn’t have to be a pose where they are close together. Just brake them a part and make them look cool!


engagemnt-10.jpg


Travis Hill is photographer from Baltimore Maryland. See more of his work at his studio site, his posing blog and on Facebook.


Post from: Digital Photography School

"

8 Tips on Taking Party Photographs

Eredeti: Digital Photography School, 8 Tips on Taking Party Photographs: "

A Guest post by Melissa Ashenhurst from Ashenhurst Photography.


Parties are a great time for family and friends to come together and have some fun. Here are 8 simple tips to help with taking the party shots that last.


Image by Dustin Diaz


1. Break the camera out early


Depending on the type of party you may need to start taking pictures early. Arrive early to take pictures of the decorations, food, the cake, etc before any people show up.


2. Get the group


Typically people don’t stay in a large group at parties; they are all spread out in smaller groups. While having everyone in the same room at the same time, get that group shot so you can treasure it afterwards.


3. Capture the emotion


Keep your camera handy and turned on so you’ll be ready for those spontaneous expressions.


4. Be Candid


You can get some great shots of your family and friends when they don’t even know they are getting their picture taken. This is great for capturing emotion at the party


5. Don’t be afraid to zoom in or out


Don’t be afraid of zooming in so your subject fits into your camera frame. This way you can capture the expression of the subject. Also make sure you get pictures of the party as a whole, don’t be afraid to zoom out to capture the entire room.


6. Avoid Red Eye


One of the most common occurrences when taking pictures of people at parties is red eye. To make sure your friends and family don’t look evil eyed have them look just over your shoulder rather than directly at camera. This should help reduce the chances of red eye in your pictures therefore saving you time having to take it out before printing them.


7. Know the schedule of events


Make sure you get a copy of the time of the events so you can have your camera ready and specific shots are not missed.


8. Try different perspectives


Don’t be afraid to try different perspectives throughout the party: get at eye level with the kids to get their perspective of the party or take pictures standing on a chair or staircase to get a shot of everyone at the party.


Post from: Digital Photography School


"

Embracing the Weather with Photography: Part 2

Eredeti: Natalie Johnson, Digital Photography School, Embracing the Weather with Photography: Part 2: "

Previously we discussed how sunny, rainy, snowy and overcast weather can affect your scene, now we will look at how other forms can help and hinder your photography…


Cloudy Skies


Image by MorBCN


Many photographers are often thankfully for bright but cloudy skies, as that thin veil of cloud can diffuse the sun’s rays producing a perfect delicate and soft light – much like a softbox does. However on a windy day clouds can be blown across the sky in minutes and your perfect light could be gone as quickly as it arrived so you’ll be forced to work quickly and if you have limited patience you may be forced to restrict yourself to grabbing safety shots before getting creative.


For the landscape enthusiast this can often lend itself to the genre; for example a valley sewn together with patchwork-like fields can look radiant with dappled sunshine and spotted a few darkened cloud shapes. To get the most out of this scene, meter for the whole frame to gain the average exposure or bracket exposures to compile together later. Some models now offer an in-camera HDR setting – if you are confident in its abilities perhaps try it here.


To capture nothing but the clouds, such as a fierce storm cloud before it breaks; set your camera upon a tripod, select a narrow aperture, zoom in as close as possible and meter across the scene due to the varying exposure levels within the frame – as such a circular polariser may be of benefit here too.


Frost


Image by Eduardo Amorim


Shooting in the early hours can often produce the best photography thanks to that soft, warm and subtle light and if the ground is sprinkled with a fine layer of frost, the colours of the earth can appear luminous as the ice shines against the shine’s glare. Find a location where the ground shows through and a variety in colours will also add interest. The potential for delicate frost-covered macro shots is vast, so pack a waterproof blanket and get as close to nature as you dare. Use a wide aperture and employ a polarizer should you want to saturate colours.


Lightening Storms


That elusive and fleeting electrical bolt can drive even the most patient of photographers crazy. To maximise your chances of a decent capture set your camera on a tripod and turn off the lens’ vibration reduction option. If are shooting with a compact switch it into fireworks mode and keep as still as possible or balance the device on something solid.


Image by Brujo+


Finding a good shooting spot is half the battle. Shooting in urban environments such as towns and cities are counter-productive as the light pollution can detract from the ambience of the storm, so if possible travel outside of the urban district and away from abundant light sources to a place where the skies appear darker.


When using a DSLR set the camera into Manual and ISO 100. A wide angle lens will give you a better chance of catching the fork as it falls and this offers you the potential to later crop in for effect. Alternatively zoom in with a telephoto for extra drama and the ability to play with perspective. In either case it is ideal to compose the scene to include foreground interest.


Ideally an aperture of around f8 will yield strong results but will depend on what else you want to capture within your scene. Keep the shutter open using the bulb exposure for a shutter speed of around 15 to 30 seconds (or even more in some cases) and release the button when the fork hits. Due to the sporadic nature of lighting you will find you have to repeat this process several times to get a decent shot and for well defined images it is recommended that you incorporate a remote to release the shutter or a self timer (although this will take extra patience).


Fog


Don’t think of fog as dull, think of it as enchanting and like most weather, fog looks best at first light. A tripod is essential and lengthy exposures will work best here with a polarising filter helping to control exposure.


Image by monkeyleader


Foggy scenes are generally low-contrast events and as such colours are muted – two things you can later tweak in the editing suite if required. However, this lack of immediate interest combined with a void backdrop will mean you will need to compensate in other ways to engage the viewer – i.e. intriguing foreground interest, so consider the composition wisely.


Wind


A strong gust of wind is often the common culprit for shaky landscape captures, so take a plastic bag along with you to the location and fill it with rocks and stones along the way. Hang this bag on the hook underneath the base of the tripod to ground it; alternatively you can use your camera bag backpack.


Image by dawn m. armfield


Once in position and a stable position too, consider using a lengthy exposure to capture the movement of clouds across the sky. Again a polariser or ND Grad filter could help you here.


Post from: Digital Photography School


"

Newborn Photography Tips for Beginners

Eredeti: Natalie Johnson, Digital Photography School, Newborn Photography Tips for Beginners: "

Image by mootje_ mootje


  1. It can be exciting photographing a newborn so compose a list of shots you want to take before you pick up the camera. Grab these ‘safe shots’ first and once you have this selection in the bag, start to get creative with new angles and ideas.

  2. The best lens to use when photographing any type of portrait is a fast 50/85mm prime lens. Operating at wide apertures (small f number) will allow you to work in darker environments and capture stills with the focus on your subject and a blurred backdrop to remove distraction.

  3. If you’re uncomfortable operating in manual mode then plump for Aperture Priority and opt for a wide aperture of f4 or f5.6. Focus on your subject’s face and include a section of the backdrop into the frame. This is where an interesting or colourful background can make the scene more dynamic. Alternatively position yourself at the end of the child and focus on the feet – throwing the rest of his/her frame into a creatively blur.

  4. Attach a zoom lens to vary the composition of your shots; catering for up close cute pictures of feet, hands, nose or ears for example and then span out wide to grab contextual portraits or ones that reveal the entire length of the child.

  5. As with any portrait pictures you’ll want to use even light. Avoid flash at all costs – not only is this disruptive to the calm atmosphere you want to create but it can rob the image of texture and tone. Position the cot or child near a window (using a white sheet or curtain to diffuse if it is a particularly bright day. Remember to exposure for the face.

  6. Declutter the scene of distracting items such as nappies or bottles and incorporate soft blankets for interesting colours and texture. Consider placing props such as a loved toy or teddy to emphasis size.

  7. Black and white images can carry more emotion that their colourful counterparts so experiment when photographing or editing images post shoot. Some cameras offer this as a menu choice but so you don’t restrict yourself it is advisable to shoot in colour and desaturate or select a B&W option in an editing program later. Play around with curves in Photoshop or the Presets in Lightroom to control contrast and brightness of the shadows, midtones and highlights.

  8. As newborns grow at such a daunting pace, many proud parents choose to photograph their tots at periodical intervals to chart the change. A collection of these images printed in a photobook can make a wonderful gift for a family member.

  9. To emphasis the petite proportions of your newborn try taking images with the parent. For example – baby’s hand on mum and dad’s hand, or the baby’s feet in between the fathers. Use a wide aperture and ramp up ISO if shooting in low light environments.

  10. The best time to shoot an infant is arguably after he/she has had a feed and has been put down for a nap. The noise of the shutter shouldn’t disturb them and means you can move their little hands and feet delicately without resistance or movement.


Post from: Digital Photography School

Capturing the perfect Flower Macro [For Beginners]

Eredeti: Natalie Johnson, Digital Photography School, Capturing the perfect Flower Macro [For Beginners]: "

If you appreciate the subtle beauty of a freshly bloomed bud or want to preserve the memory of that bright and bold gift bouquet why not try putting your photography skills to good use and capture a delicate floral macro?


Image by Hamed Saber


Begin by finding the perfect specimen and if possible place it in an area with great soft light, for example in front of a window that is shielded with a sheet or net curtain. If the plant is outside either move it to a shaded location or find a way of diffusing the sun’s rays with a piece of fine material if the light is particular harsh or the sun is at a high position in the sky. Shoot with your back to the light (without blocking it) or from the side, so that the light falls gently and delicately on the flower head’s crevices and petals, effortlessly eventuating texture, colour and the intrinsic detailing. An overcast but bright day will undoubtedly harvest optimum captures, but if you need to ‘add’ extra light utilise a reflector to lift details from the shadows.


Next set the camera onto a tripod or if you are lacking one try using something as a stable substitute to support it underneath. Using something like Joby’s GorillaPod for DSLRs will be extremely useful here, especially when shooting immoveable or smaller specimens as the accessory is relatively dainty and low to the ground as it doesn’t have a restrictive centre column like a tripod does.< ?p>

Image by Auntie P


In terms of glassware a macro lens or extension tube will reap stronger images, otherwise experiment with focal length you have at your disposal and use your distance to influence the composition, determine how close you can get to secure a lock. Some people prefer the simplicity of auto-focus, whereas others surmise that manual offers greater creative control, either way decide what you want in focus, lock on to it and then recompose.


If you are using a point-and-shoot device, opt for the camera’s macro mode and ensure that the flash is deactivated. DSLR or hybrid users should switch into Aperture priority and experiment with the lens’ aperture range to alter how much detail is captured. For a crisp centre and softly blurred petals or background opt for an aperture of between f1.8 and f4 depending on the strength and range of the effect you want to generate. If you’d rather keep the flower head’s details crisp use a narrower aperture such as f18 or even f22.Depending on the colour of the flower you may find you’ll need to employ exposure compensation to balance the scene.< ?p>

Image by Evan Leeson


Stand above the flower and shoot the subject from various angles, then lower the lens in stages to the same level as the flower and shoot again, finally fall beneath the flower head and shoot up at its delicate underbelly.


Review your captures onscreen to determine what appeals to you or what you would like to develop. If you want to tweak the captures in an editing suite it is advisable to shoot in RAW so all of those vivid details and colours are naturally replicated.


If you would like to repeat the photo session at a later date, try experimenting with various lighting techniques, lenses, gels and include elements such as water for that heightened level of interest. Shooting a flower macro just after it has rained, or before snow or frost melts, can really exaggerate the specimen’s beauty and lends itself to creating a more dramatic photograph.


Further Reading on Photographing Flowers: How to Photograph Flowers and Photographing Flowers – A How-To


Post from: Digital Photography School


"

Two Things I Tell Every Bride

Eredeti: Elisabeth Halford, Digital Photography School, Two Things I Tell Every Bride: "

Weddings are such delicate piece of work. They can’t be done flippantly or without preparation. And with such easy access to high performance pieces of equipment, it is so easy for just any Joe Schmo to buy a DSLR and some business cards. This practice means that us professionals need to be completely on the ball in business and sell ourselves and our services appropriately. Yes, Joe will give you a whole day of shooting and the disk for £300. But he will also give you a lot more than you bargained for if you were actually expecting professional grade results.


I had a message from a friend/client recently who shared her disappointment with her wedding photos. She said, “I ended up with only 3 or 4 good shots from the whole day!! Still have photos in my album with red eye, ones completely in shadow and even though I asked for non traditional photos still have pages of eveyone looking centre and bored, the whole thing just totally unispiring!!!!! It is my own fault really for not knowing what to look for.” When I asked if she’d even seen his work prior to hiring him, she replied, “I saw a few things that he had done, he had a phtography room in his house (wait, he didn’t go to her? Jerk.) with framed pictures on the wall, obviously some of his better shots!! He was just in the process of setting up a new website so had limited access to previous wedding photos (yeeeeah ok. Buh bye!)” I really feel for this girl. Most of our clients aren’t going to be photography minded. They know they need a photographer at their wedding (the first step in the right direction) but after that, they don’t really know what to look for. I imagine wedding magazines give them tips for this important decision.


There are a couple key points from what she said that we can learn from:


1. “…even though I asked him for non traditional photos”


This is where we can see that our clients need our help. It is our responsibility to show them, tell them and then show them again our style. You can’t ask a point-and-shoot photographer to take ‘non traditional’ photos. And as she told me, she should have known better what to look for. But you won’t have a happy client if what they want is non traditional and your style is traditional. You know, you can turn down jobs. I’ve said before that “I don’t think I’m the right photographer for you”. In your pre-booking first meeting, show them your style and make sure it’s clear. My contract says that if a photo is in B&W, that is my judgment call and that it is commonplace for wedding photos to be primarily in B&W to preserve the emotions and the timeless, classic beauty of this act of love. I used to say that I refused to edit in selective colour. I still hate it but many couples want it. So I provide it but I don’t post them online or show them to potential clients.


2. “…obviously some of his better shots!”


Hold it RIGHT THERE! Did you just speed over that phrase? She’s saying exactly what WE should be saying. That those 5-10 perfect moments we post on our blog the day after a wedding and the photos we share in our first meeting with a bride are our best work. I learned very quickly that my brides were expecting that level of perfection for every single photograph. Some were expecting me to do total magic and turn their fluorescent-lit, 1970’s carpeted town hall wedding into some sort of visual masterpiece. I don’t accept work if the venue is a shambles, by the way. Another perfectly good reason to turn down a wedding. Share with them the things about the album they’re looking at that made those photos some of your best. Tell them that the couple required no coaxing, pleading and begging to just ‘act natural’. Tell them that the location was carefully planned to take the photography into consideration. Tell them that the couple took your advice and didn’t place the head table smack in front of a gigantic window (also in my contract). Explain that you will also provide them with ‘regular’ pictures to record their day, their guests, their carefully planned details. But that perfect shot of the rings that took 10 minutes to style (it’s not easy hanging a diamond off a dew drop!) and then another 5 minutes to photograph will not be the norm for every one of their resulting 500 images.


As photographers, we absolutely must communicate every last detail of our services to our client and have a very detailed, specific contract to fall back on if they don’t make room for you in the wedding car and then complain that there are no photos of them in the wedding car. It is their right to know everything your brand is about and your responsibility to communicate that to them. Trust me. After all, I’m that learned-everything-the-hard-way photographer.


Post from: Digital Photography School


"

How to Set Your Preferences in Lightroom 3

Eredeti: Darren Rowse, Digital Photography School, How to Set Your Preferences in Lightroom 3: "


Ever been overwhelmed by the preferences in Lightroom and don’t know how to set it up?


Greg from FroKnowsPhoto put this video together to walk you through how he sets his preferences in Lightroom 3.


Post from: Digital Photography School


"

How to Become a Pro Photographer: Part 1

Eredeti: Digital Photography School, How to Become a Pro Photographer: Part 1: "

Image by Romain Guy

As lovers of photography – we can all admit to dreaming of chucking in the day job and setting up shop as a professional photographer, but for many of us it can remain just that – a dream. But for those with the talent, support system and drive, becoming a freelance photographer can be realised! So what’s stopping you? To help you negotiate your way from using photography as a hobby to making a living from your work we have outlined a few helpful hints below. Obviously not everyone has the luxury of jacking in the job right away but with a little patience and preparation anything is possible!

Financing


Your first consideration has to be monetary. Can you afford to quit tomorrow? For most people this is probably unlikely. Most pros who give up a reliable stream of income to become self-employed suggest saving two to three months salary before even considering what they will write in their resignation.

Perhaps your spouse can afford to support you for a while or perhaps you already have some money invested in savings that can be used to pay the mortgage and bills before work starts to come in – everyone’s situation will be different. Whatever your own personal situation, it is worth sitting down and planning your income and expenditure for the first few months of being self-employed and work out how much you will need to sustain yourself and your family. It is also worth investigating whether you can secure a grant from your local authority, a charity, organisation or even the government.

Finally – there is of course the option of taking out a bank loan to get started, but this should be given a lot of thought before a commitment is made.

Location


Next decided where you want to ‘base’ yourself. Working from home has many obvious benefits but can become quite isolating if you live alone and depending on your strength of will – can also become quite distracting. Also if you are working from home, bear in mind that this may not be possible in some rented accommodation – so check with your landlord. What is more, regardless of whether you are a home owner or are renting – try to avoid dedicating one room solely to your business – for example a study or a home studio – if you do you could be asked to pay business rates.

Working in a collective studio with other photographers is a great way to bounce ideas of people, whilst making and maintaining friendships – however there will be another cost involved. Setting up a shop or your own studio is another option, but again if you start off with limited finance this may be something you can aspire to over time.

Equipment


Sure you have a camera but do you have all the other necessary bits and bobs that a professional could require such as: flash guns, reflectors, filters, shutter release, battery packs, a wealth of lens, tripod, memory cards etc? This will ultimately depend on what genre of photography you enter and so you may not need every accessory under the sun – just be prepared for what you will need. Furthermore just because you are turning pro – doesn’t mean you need ‘professional’ kit! It’s how you use it that counts.

Look online for second hand deals, visit camera exchange stores for bargains, and never forget January welcomes a month of sales!

In some countries, self-employed individuals can claim back certain ‘capital’ costs against their tax bill, so ensure you keep all receipts of new items. Also if you have remembered to keep the receipts of items you are ‘bringing into the business’ i.e. kit that you already own, you may also be able to claim back some of the value of these items back against your tax bill (more on this in part 2). Talk to your account or a tax advisor to discuss these matters further.

Work ethic


Once you have your business in place, equipment at the ready and a brand built, the next key element to put into place is your working style. It goes without saying that to succeed you will need to be reliable and efficient and always meet deadlines, but how will you operate and how will divide your working day? The benefit of being self-employed is being your own boss and thus you can set your own hours, however this could also mean working late or weekends to compensate. A disciplined and motivated approach will ultimately reap the most dividends, but be sure to factor in time to relax and recoup creative energy too. For those less disciplined, create a schedule carved into twenty-four hour portions; colour eight slices to represent sleep and eight or so hours dedicated to work. The remaining hours can then be labelled for relaxation, activities, personal photography projects, housework or non-business related errands. With time, this segmentation will flow more naturally but is a great boon to those who are easily distracted. But be honest with clients and decide a reasonable date when you can realistically deliver on your promises.

In this four part series we will explore everything you need to know from getting started to finding work. In the second part, posted in the next week, we will outline the legal concerns with getting your business up and running. Stay subscribed to dPS for the next installment of this series!

Post from: Digital Photography School - Photography Tips.


dpsbook.png

How to Become a Pro Photographer: Part 1


"